The mentioned functionalities may be restricted depending on the purchased software license.
Comenzando con Displays Públicos
La herramienta de displays públicos de SmartgridX está diseñada para generar visualizaciones completamente personalizables para instalaciones. Ya sea que necesite paneles de análisis internos o displays visuales rápidos y accesibles, los displays públicos ofrecen opciones de configuración flexibles, personalizables y fáciles de usar.
Esta guía ofrece una visión general de inicio rápido sobre los displays públicos, cubriendo los componentes principales y su uso efectivo. La información detallada para cada componente está disponible en sus respectivas páginas de documentación.
⚠️ Esta función está actualmente en desarrollo activo - nuevas funciones y opciones se agregarán continuamente. Para sugerencias o solicitudes de funciones, comuníquese con nuestro equipo de soporte.
Visión General
El sistema de display público empodera a los usuarios para crear visualizaciones personalizadas para sus instalaciones con control total sobre el diseño y contenido del display.
Resumen del Flujo de Trabajo
Para configurar displays públicos en SmartgridX, siga este proceso de tres pasos:
- 🎛️ Reclama tu controlador - Registra el controlador de display público en tu cuenta
- 📐 Crea una plantilla - Diseña el diseño visual para tu instalación
- ⚙️ Configura el display público - Configura la plantilla para tu instalación y enlázala al controlador
💡 Consejo Profesional: Puedes crear y probar plantillas sin hardware físico; simplemente salta el paso 1 para previsualizar tus diseños antes de la implementación.
Configuración Paso a Paso
1. Controlador de Display Público
📖 Para información detallada sobre el controlador, visita la página de documentación del Controlador de Displays Públicos.
Esta sección cubre reclamar y gestionar el hardware de tu controlador de display público.
🚀 Opción de Inicio Rápido: ¿Quieres explorar displays públicos sin hardware? Salta a Paso 2: Creación de Plantilla para diseñar y previsualizar plantillas. ¡Siempre puedes reclamar un controlador más tarde!
⚠️ Nota: Sin un controlador reclamado, aún puedes crear y configurar plantillas para previsualizar el resultado final, pero el display público no se mostrará en hardware físico.
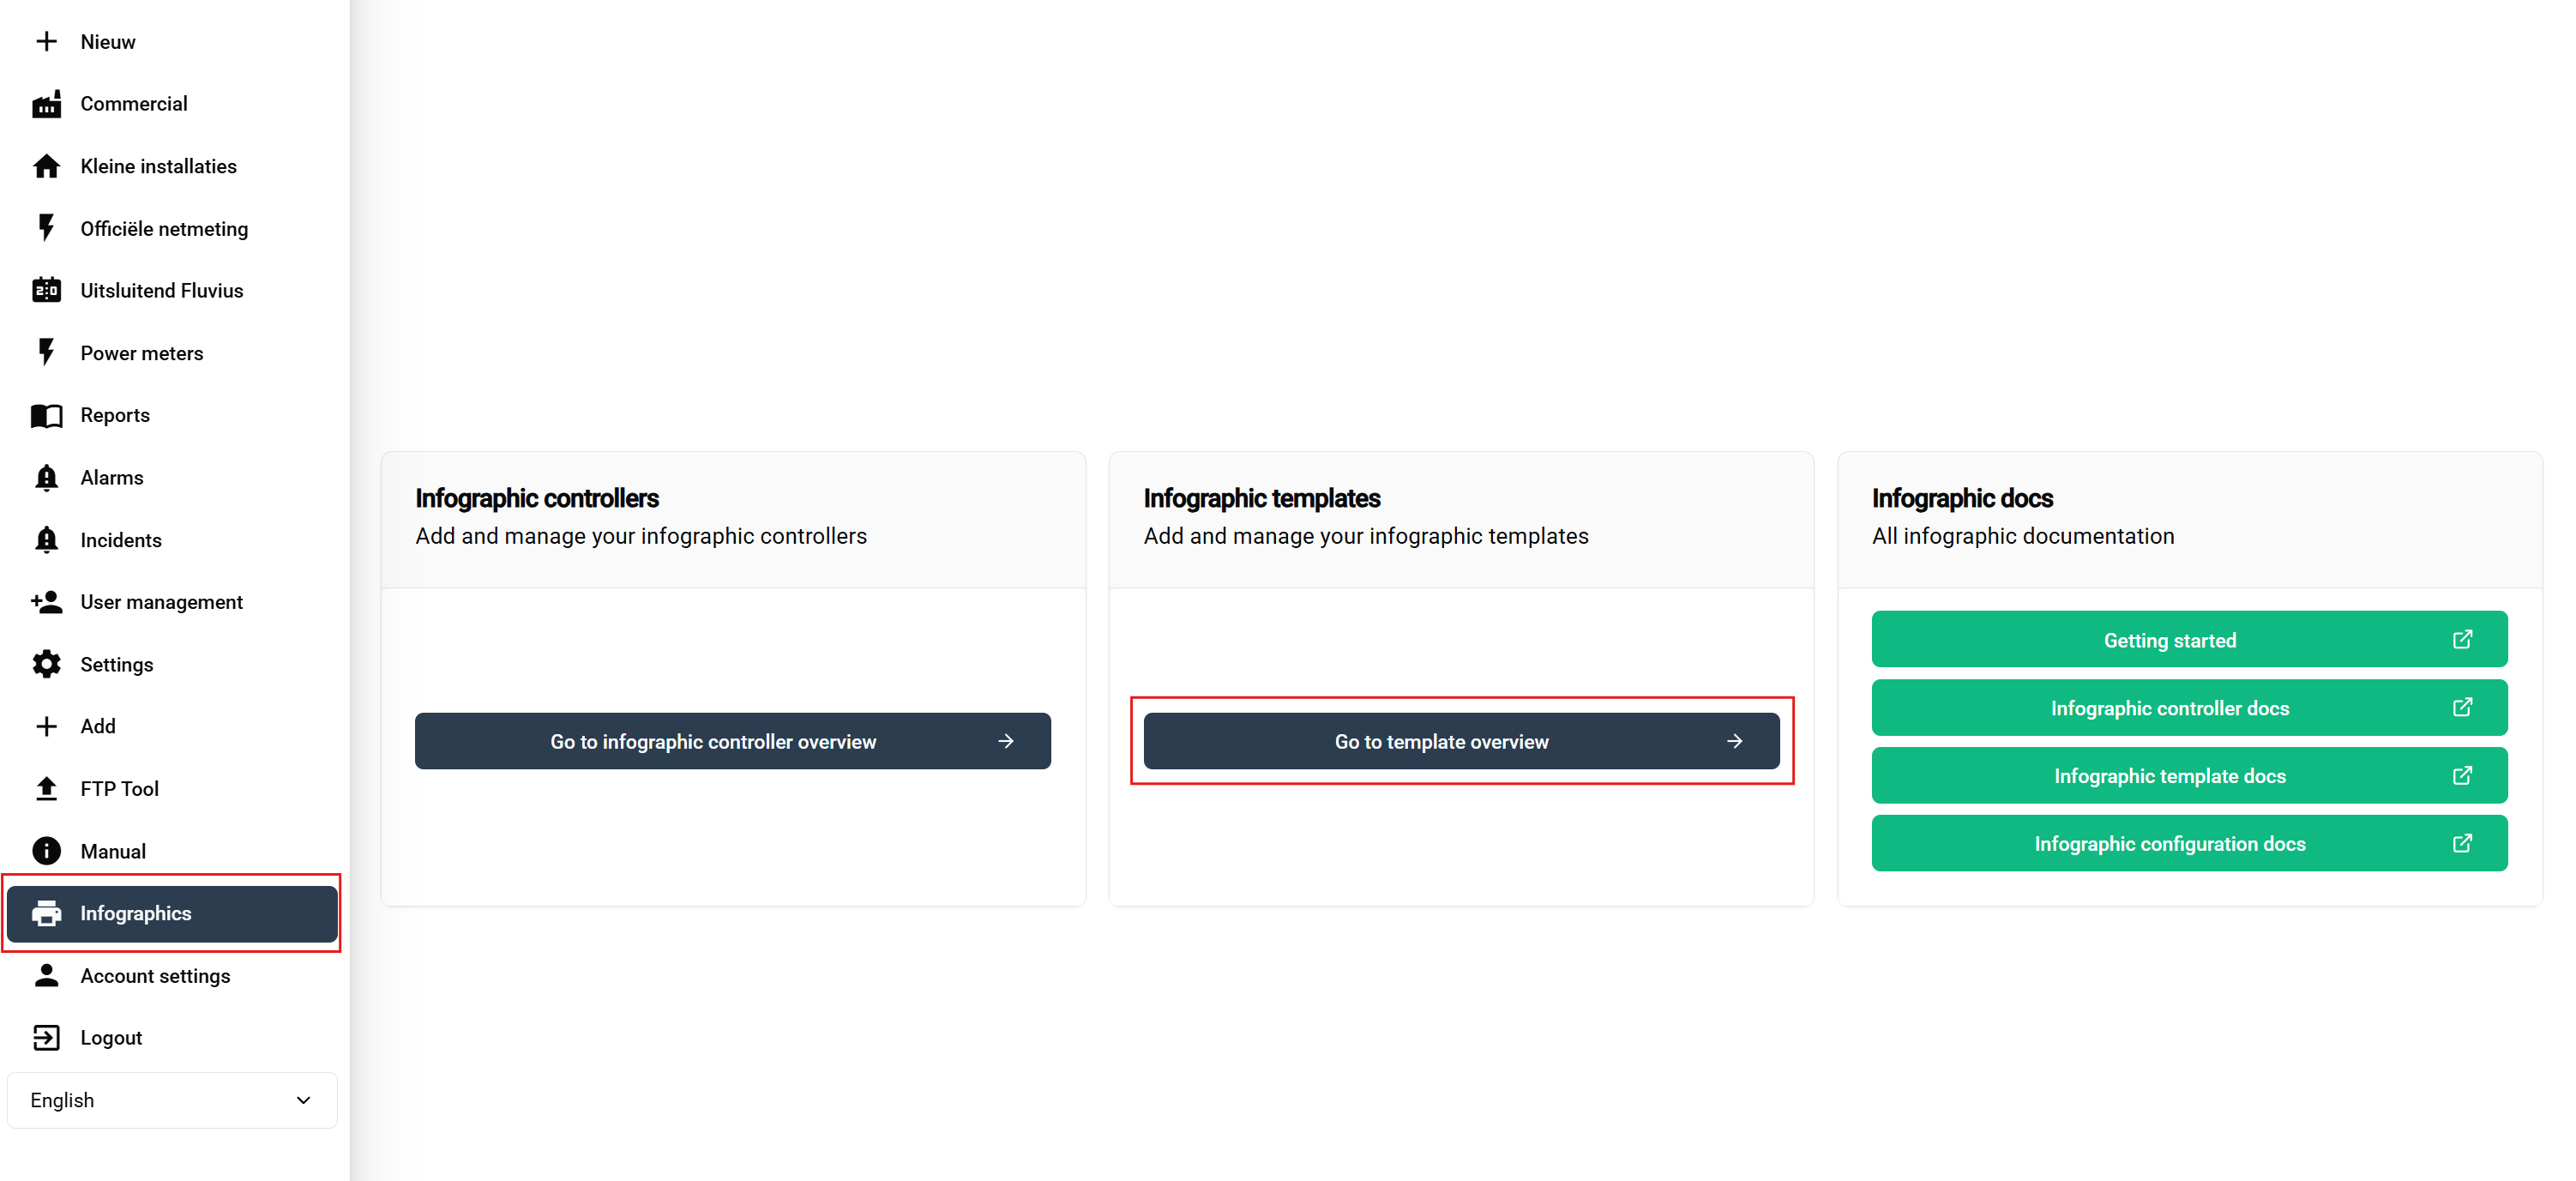
Navegación a la Gestión del Controlador

- Navega a Displays Públicos: Haz clic en la sección 'Displays Públicos' en la barra lateral
- Accede a la Sección de Controladores: En la página de vista general, localiza y haz clic en el botón Controlador de Display Público (resaltado en la captura de pantalla anterior)
Tabla de Visión General del Controlador

La tabla del controlador muestra:
- 📋 Resumen de todos tus controladores registrados
- Botón de ➕ Reclamar nuevos controladores (esquina superior derecha)
- ✏️ Opciones de gestión para controladores existentes
Reclamando Tu Controlador
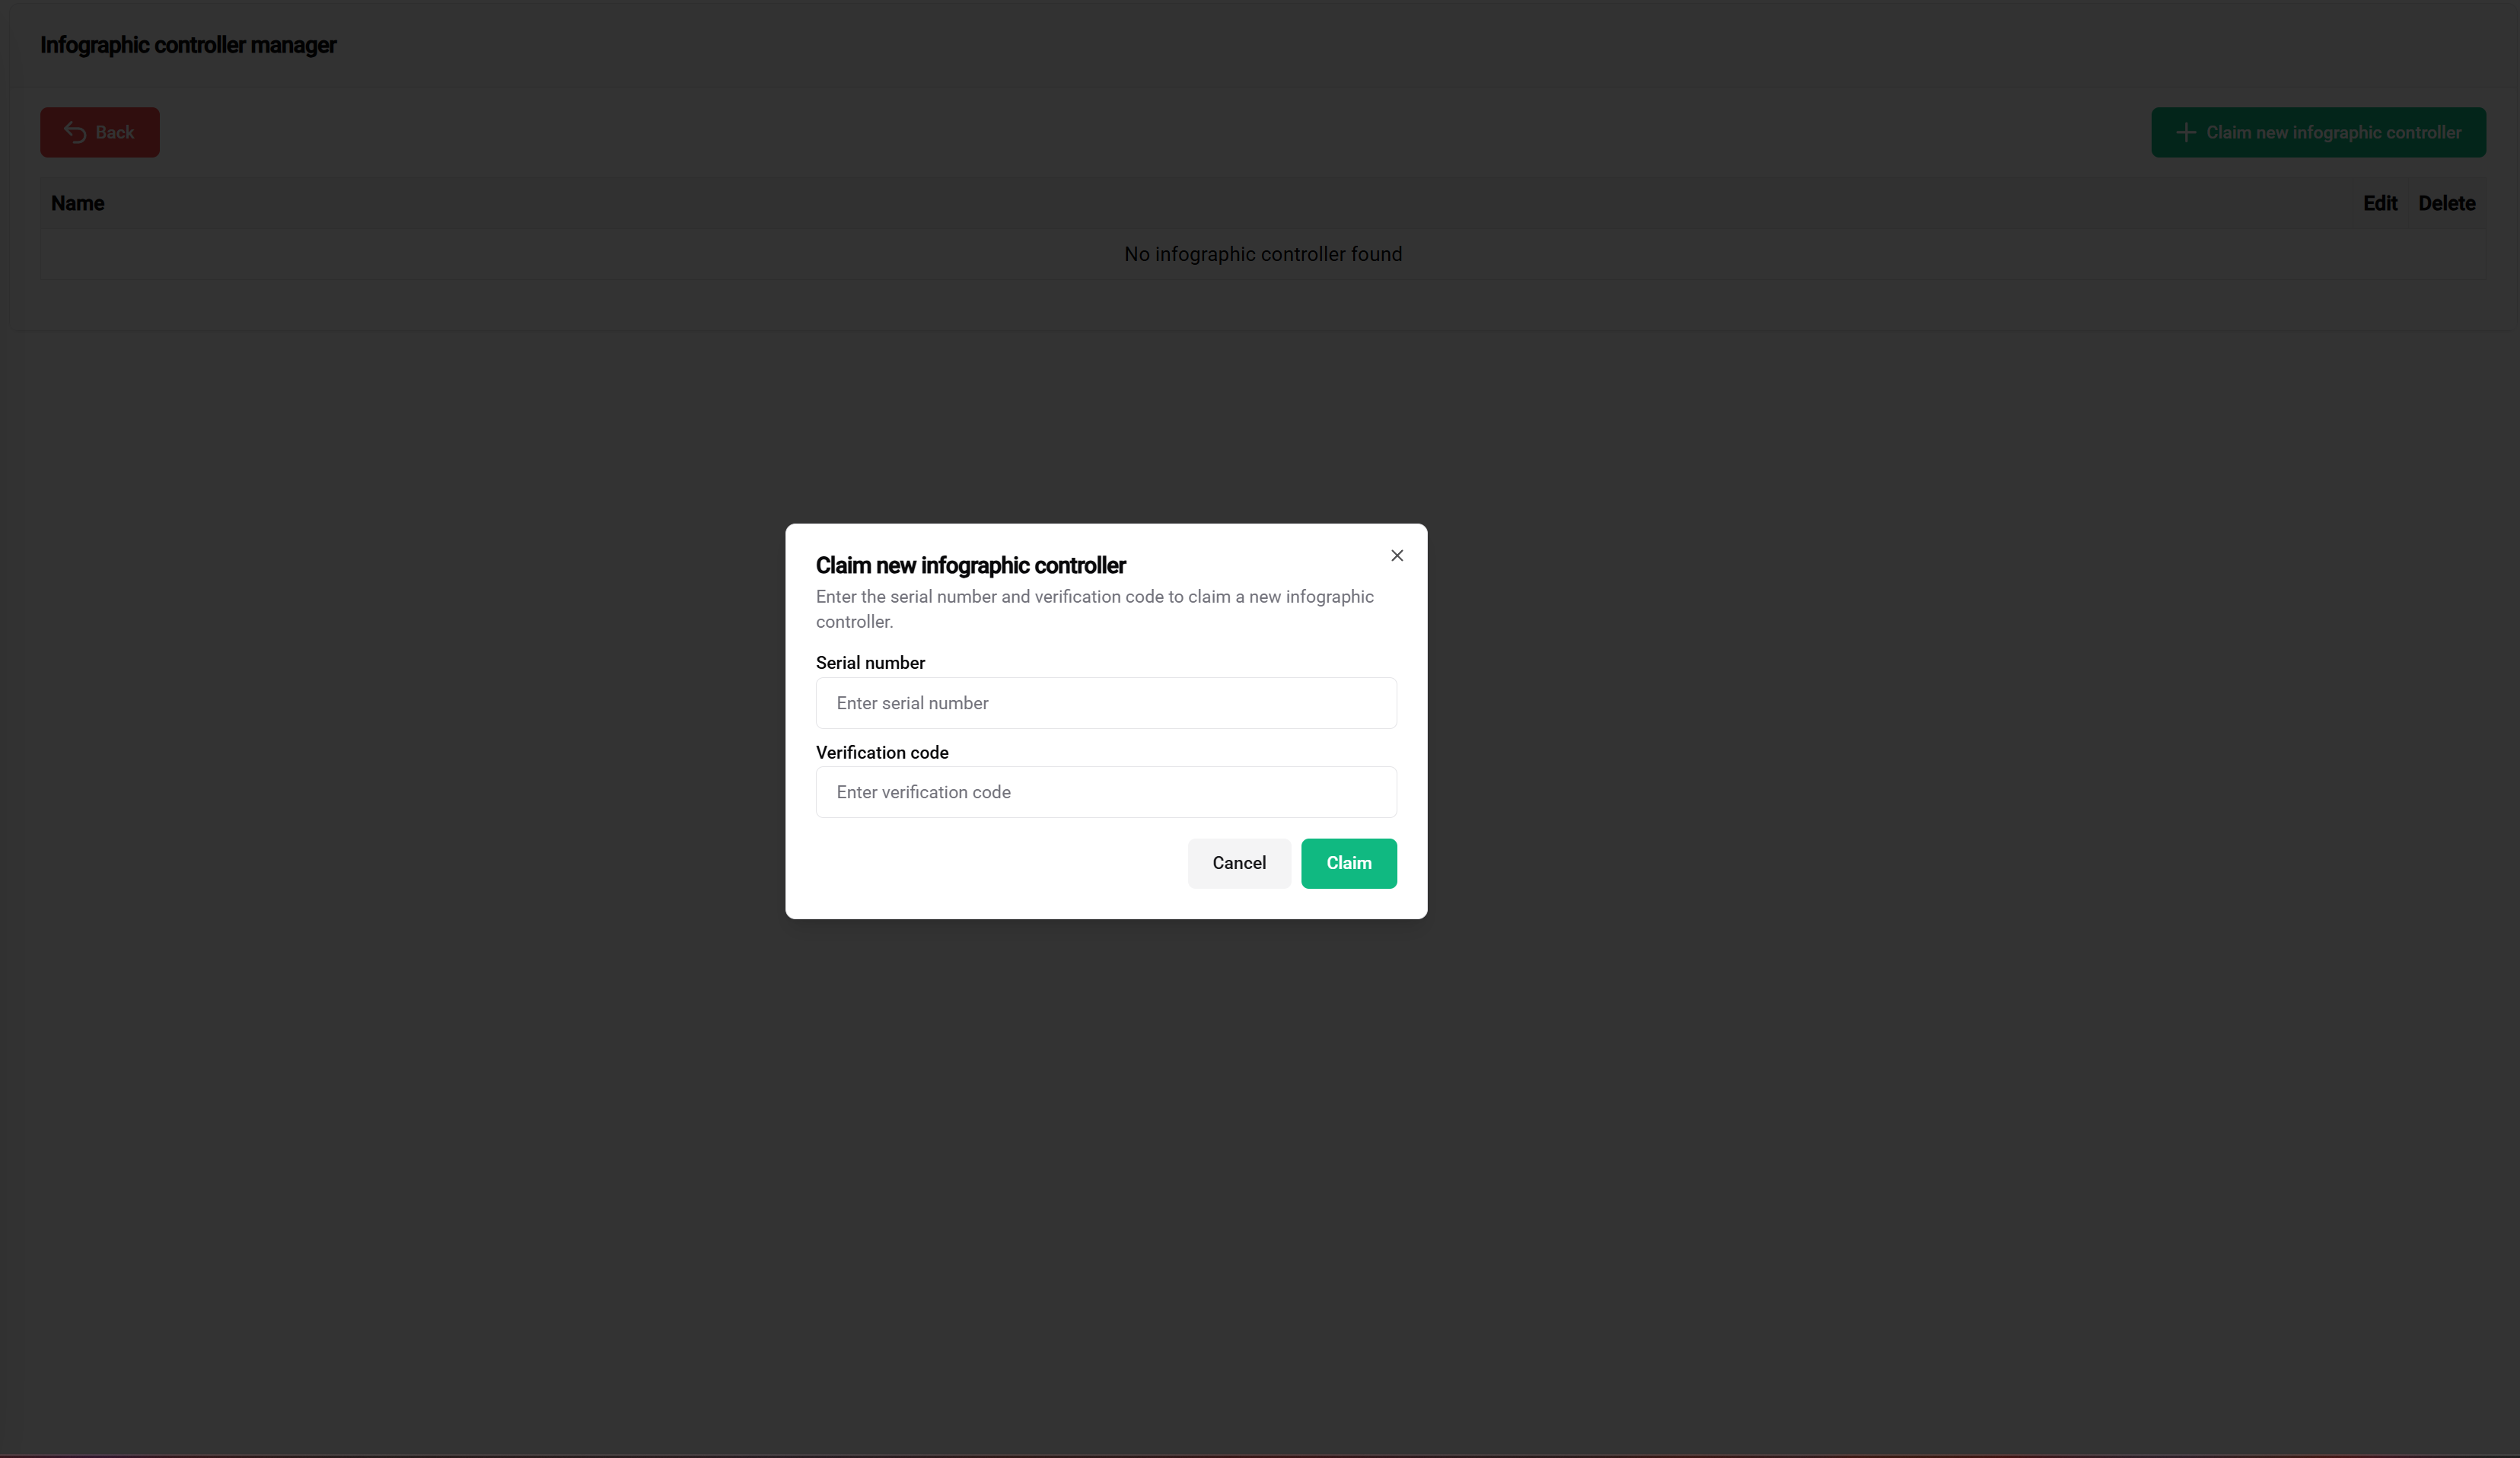
Pasos para reclamar:
- Haz clic en el botón verde "Reclamar Controlador"
- Ingresa el número de serie (encontrado en la etiqueta del controlador)
- Ingresa el código de verificación (encontrado en la etiqueta del controlador)
🔐 ¡Guarda tus credenciales del controlador de forma segura! Almacena el número de serie y el código de verificación en un archivo seguro (Excel, archivo de texto, etc.). Nuestro equipo de soporte no puede proporcionar códigos de verificación por razones de seguridad.
Controlador Reclamado con Éxito

✅ ¡Éxito! Tu controlador ahora aparece en la tabla con opciones para:
- 📝 Editar el nombre del controlador
- 🔓 Desreclamar si es necesario
2. Plantilla de Display Público
📖 Para orientación completa sobre la creación de plantillas, visita la página de documentación de la Plantilla de Display Público.
En este paso, diseñarás el diseño visual para tu instalación. Las plantillas sirven como planos reutilizables que definen cómo se estructurará y mostrará tu display público.
📝 Nota para Comenzar: Esta sección proporciona pasos esenciales para la creación de plantillas. Para opciones de personalización avanzada y configuración detallada, consulta la documentación completa de plantillas.
Accediendo al Administrador de Plantillas
Pasos de navegación:
- Ve a 'Displays Públicos' en la barra lateral
- Haz clic en el botón 'Plantilla de Display Público' en la página de vista general
Interfaz de Gestión de Plantillas

La tabla de plantillas proporciona:
- 📋 Resumen de todas tus plantillas
- ➕ Agregar nuevas plantillas
- ✏️ Editar plantillas existentes
- 🗑️ Eliminar plantillas
Configuración del Encabezado de la Plantilla
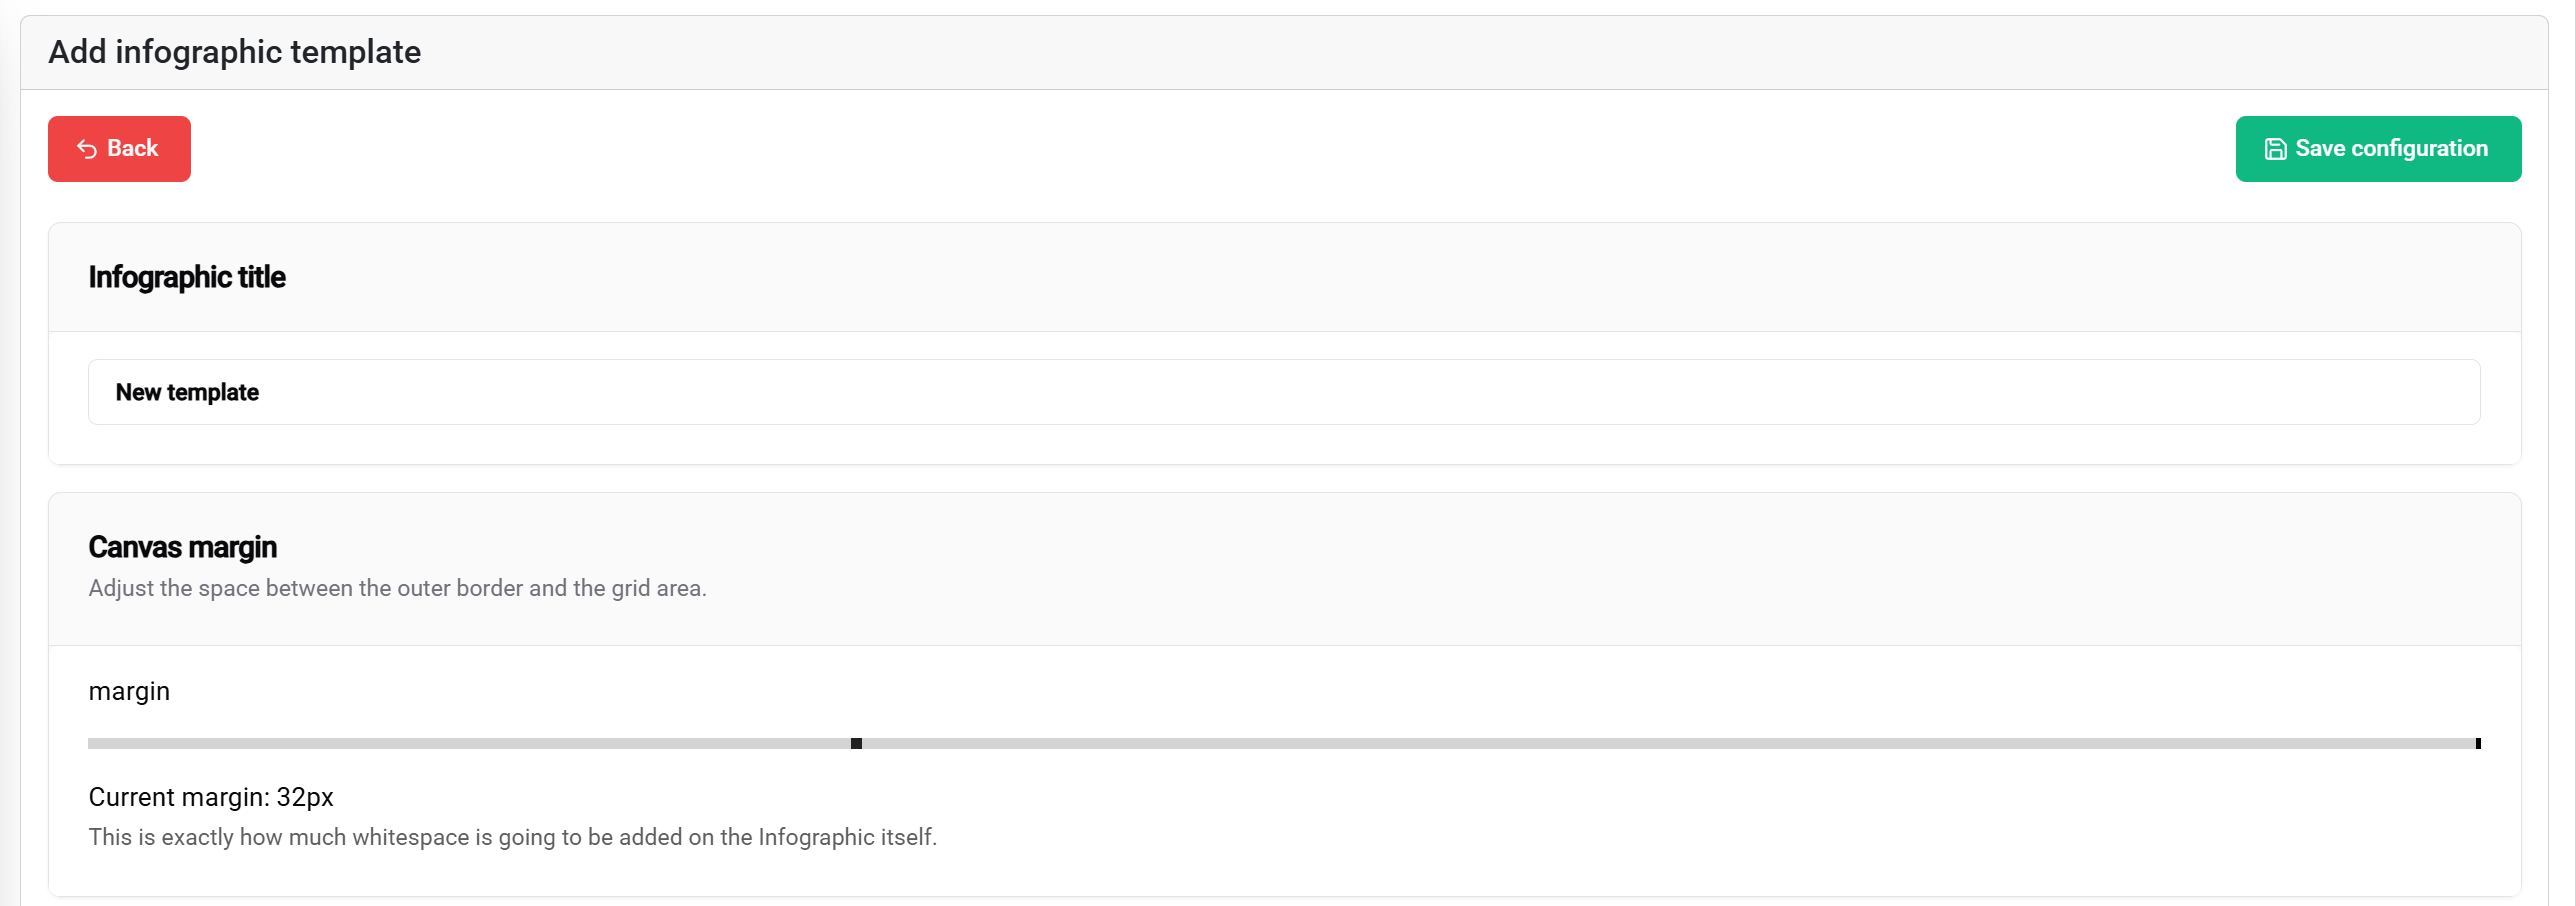
Las configuraciones del encabezado incluyen:
- 📝 Título de la plantilla - Nombra tu display público
- 📐 Configuración de márgenes - Define el espaciado alrededor del contenido
- 💾 Botón de guardar - Ubicado en la esquina superior derecha
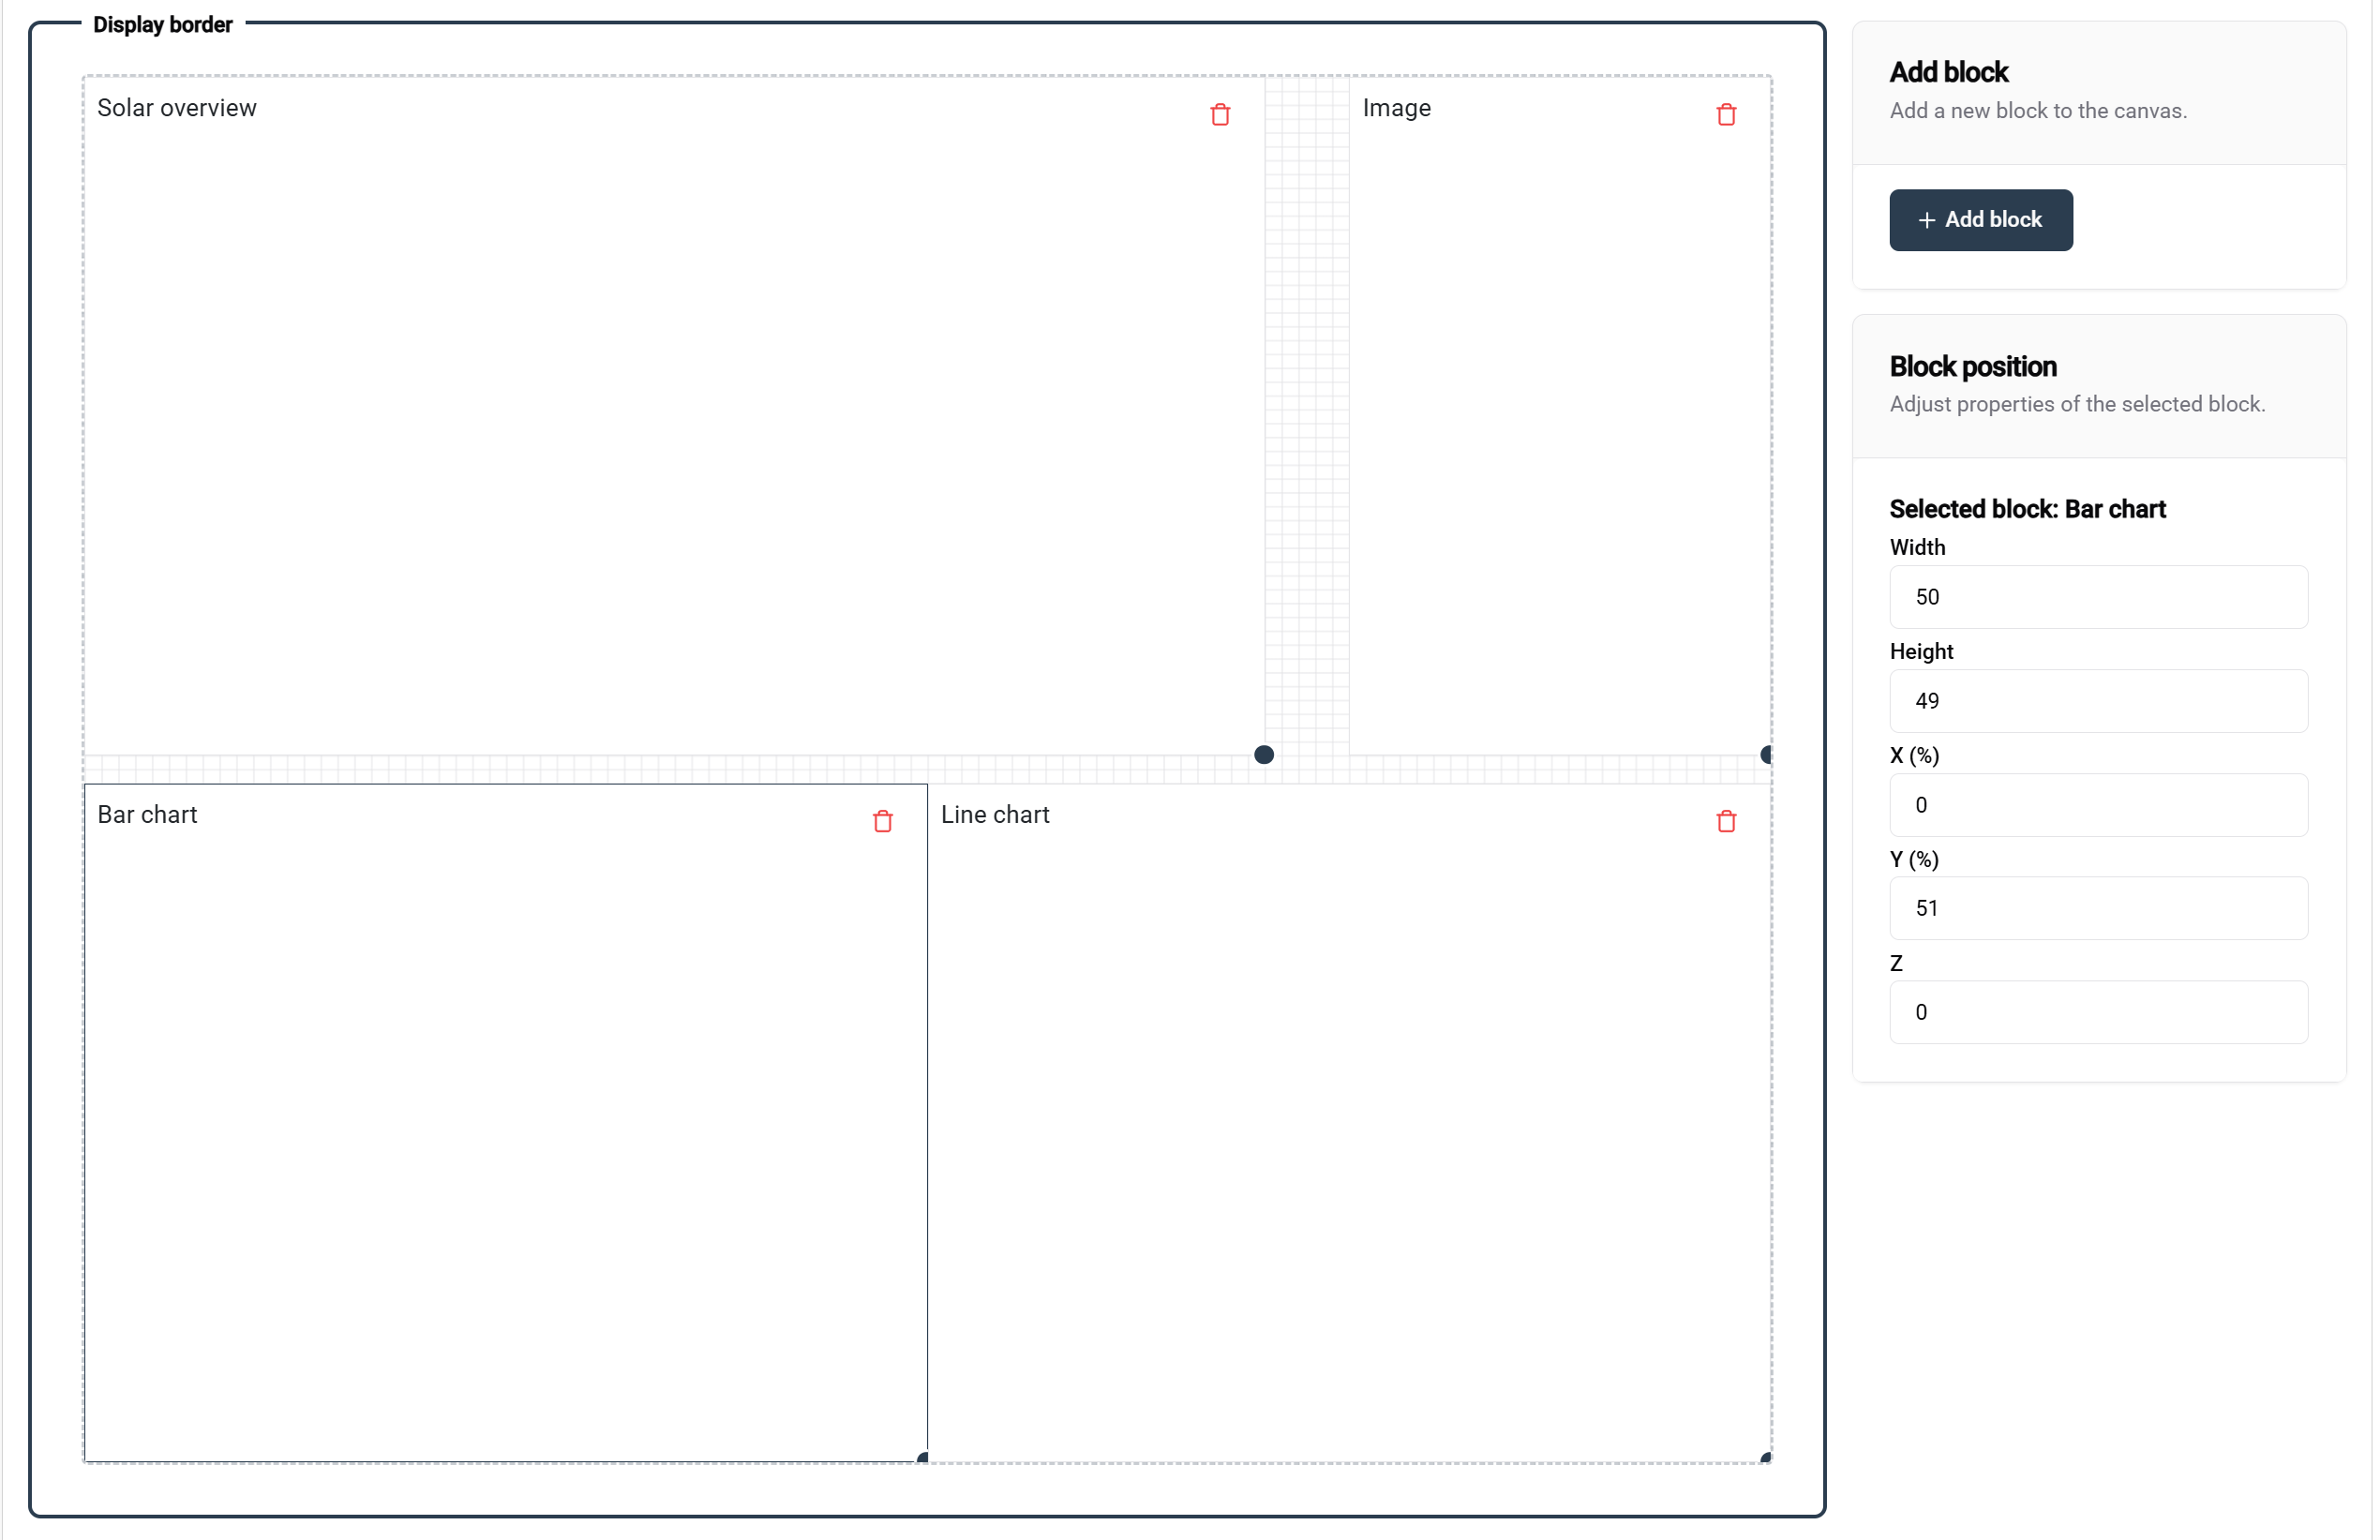
Sistema de Diseño de Bloques
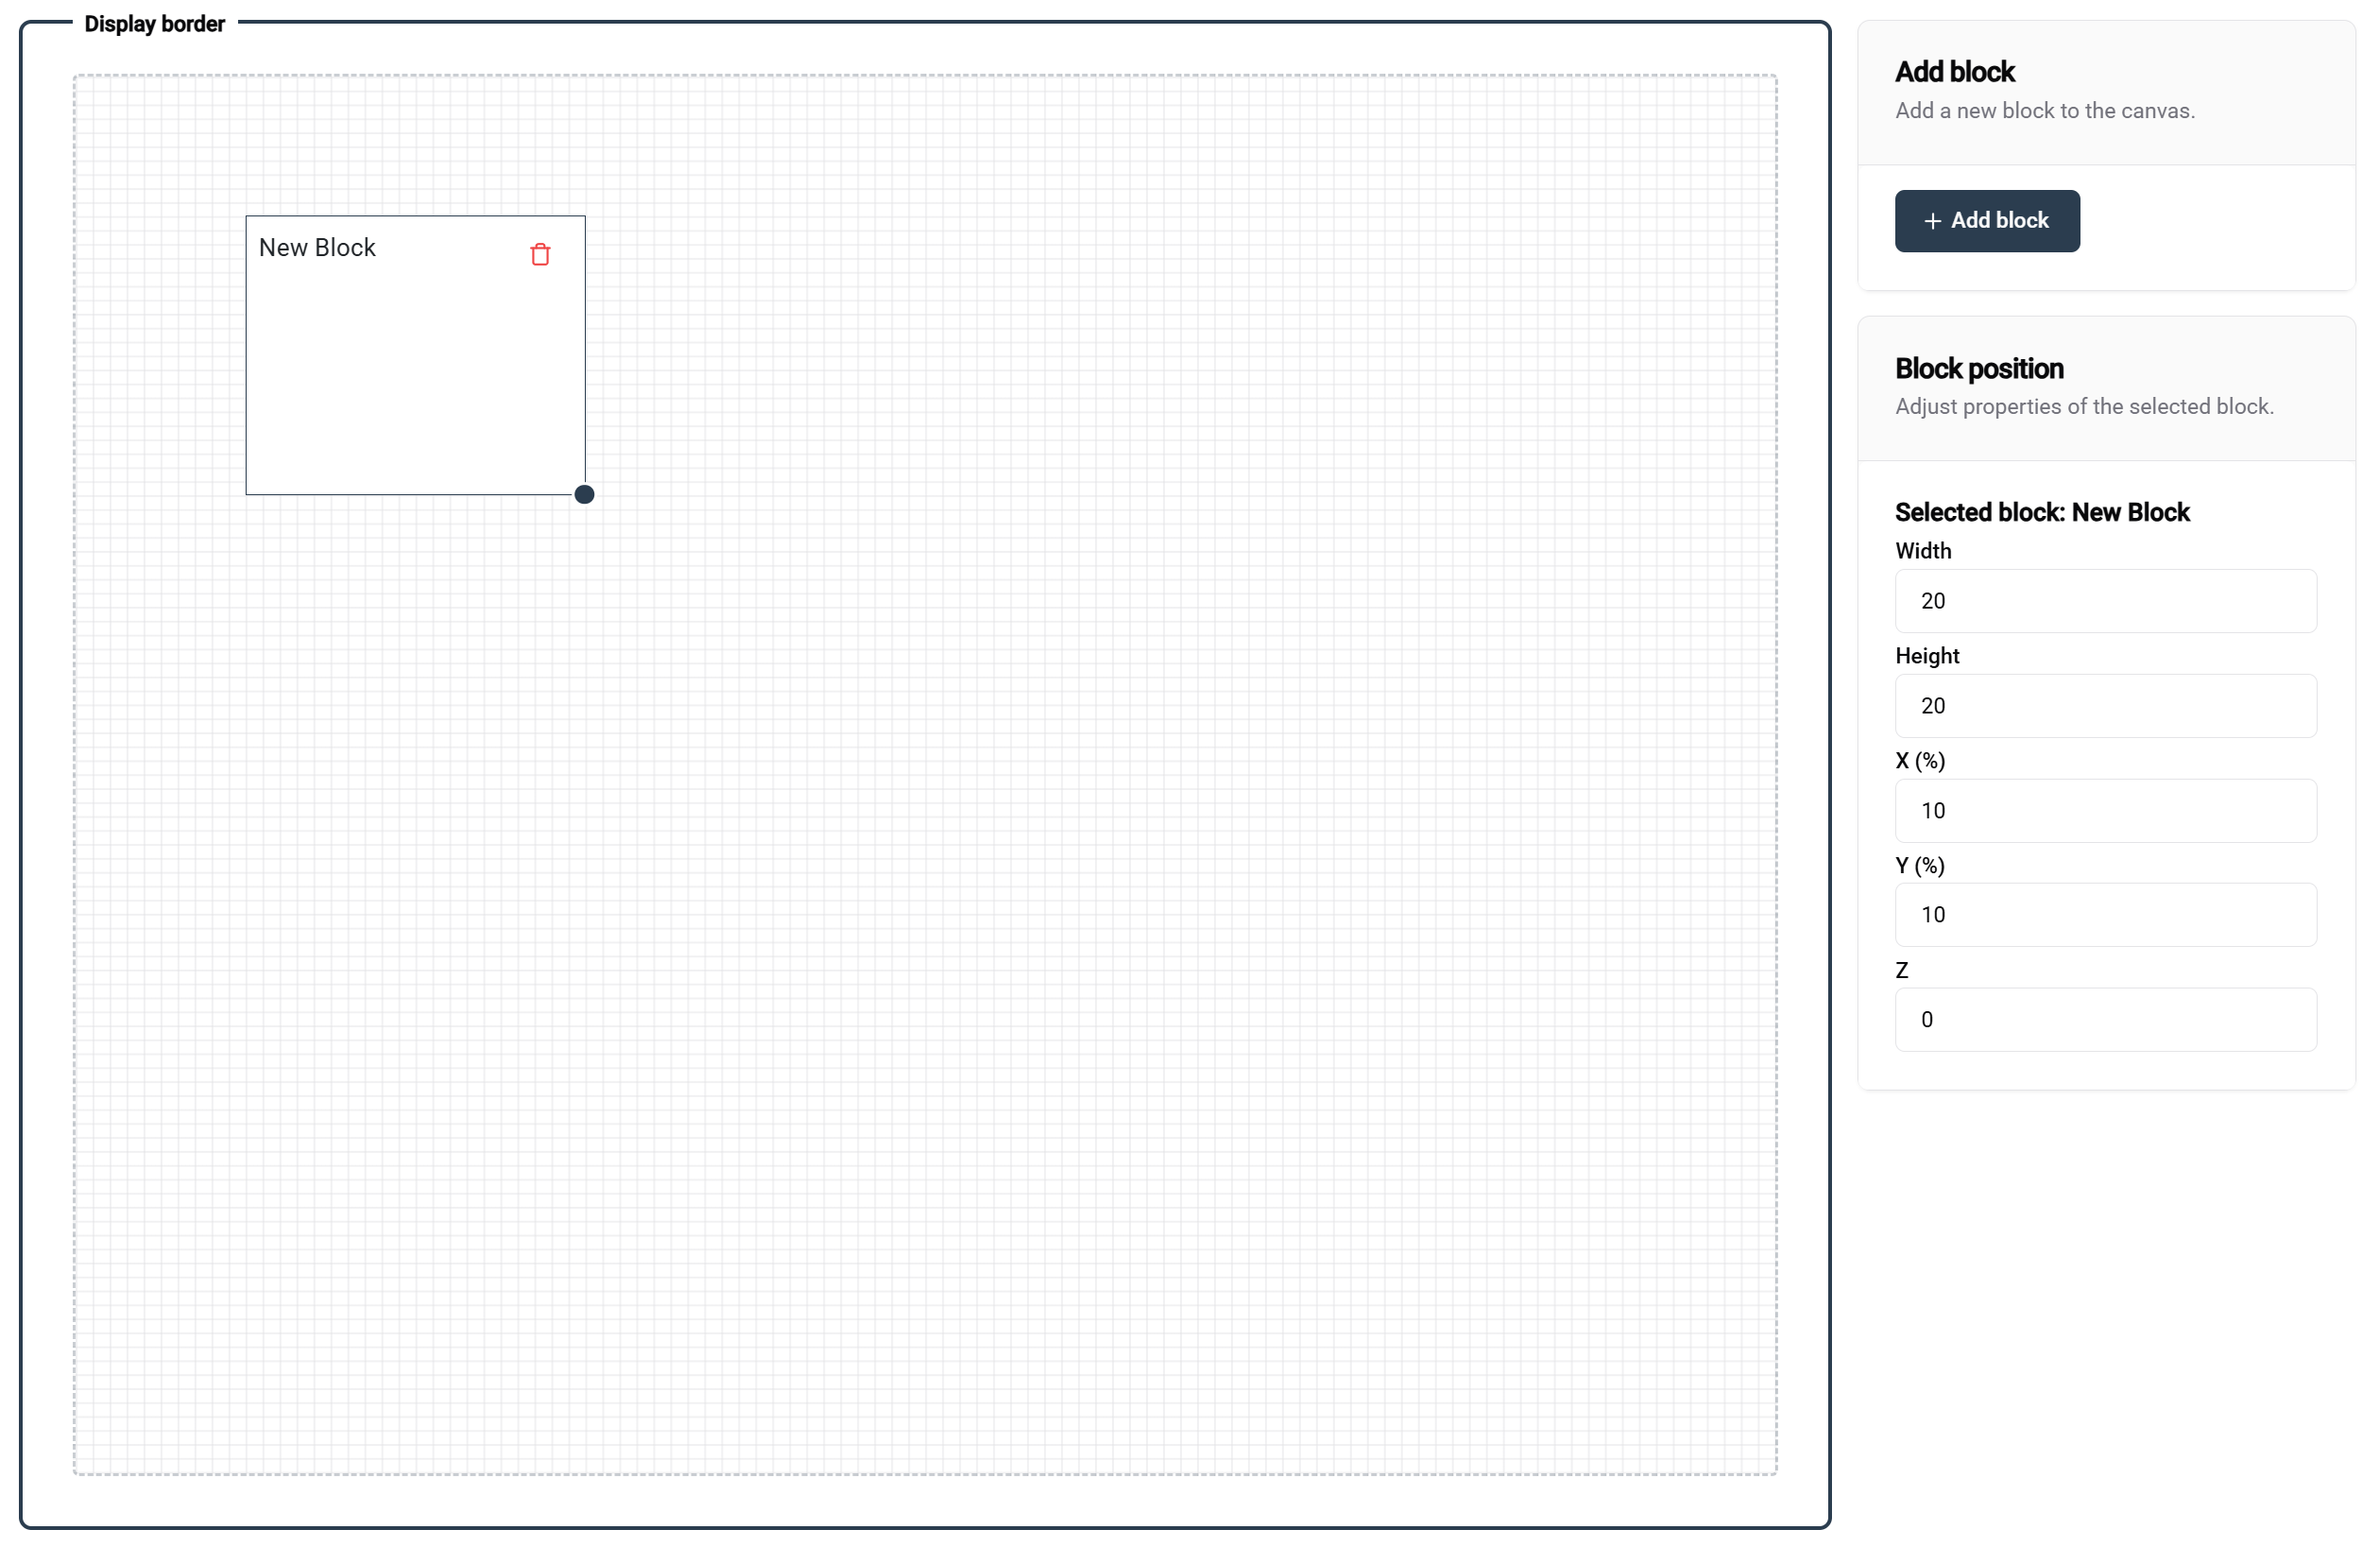
Trabajando con bloques:
- ➕ Agregar bloques utilizando el botón de la esquina superior derecha
- 🎯 Posicionar bloques mediante arrastrar y soltar
- 📏 Redimensionar bloques arrastrando la manija en la esquina inferior derecha
📐 Detalles del Sistema de Cuadrícula:
- Tamaño de cuadrícula: 100×100 (basado en porcentaje)
- Ejemplos de diseños:
- Dos bloques al 50% de ancho × 100% de alto = diseño lado a lado
- Un bloque al 100% de ancho × 100% de alto = cobertura completa
🎛️ Controles de Precisión:
- Usa el panel del lado derecho para valores de posicionado exactos
- Perfecto para ajustar la colocación de bloques
Configuración del Bloque
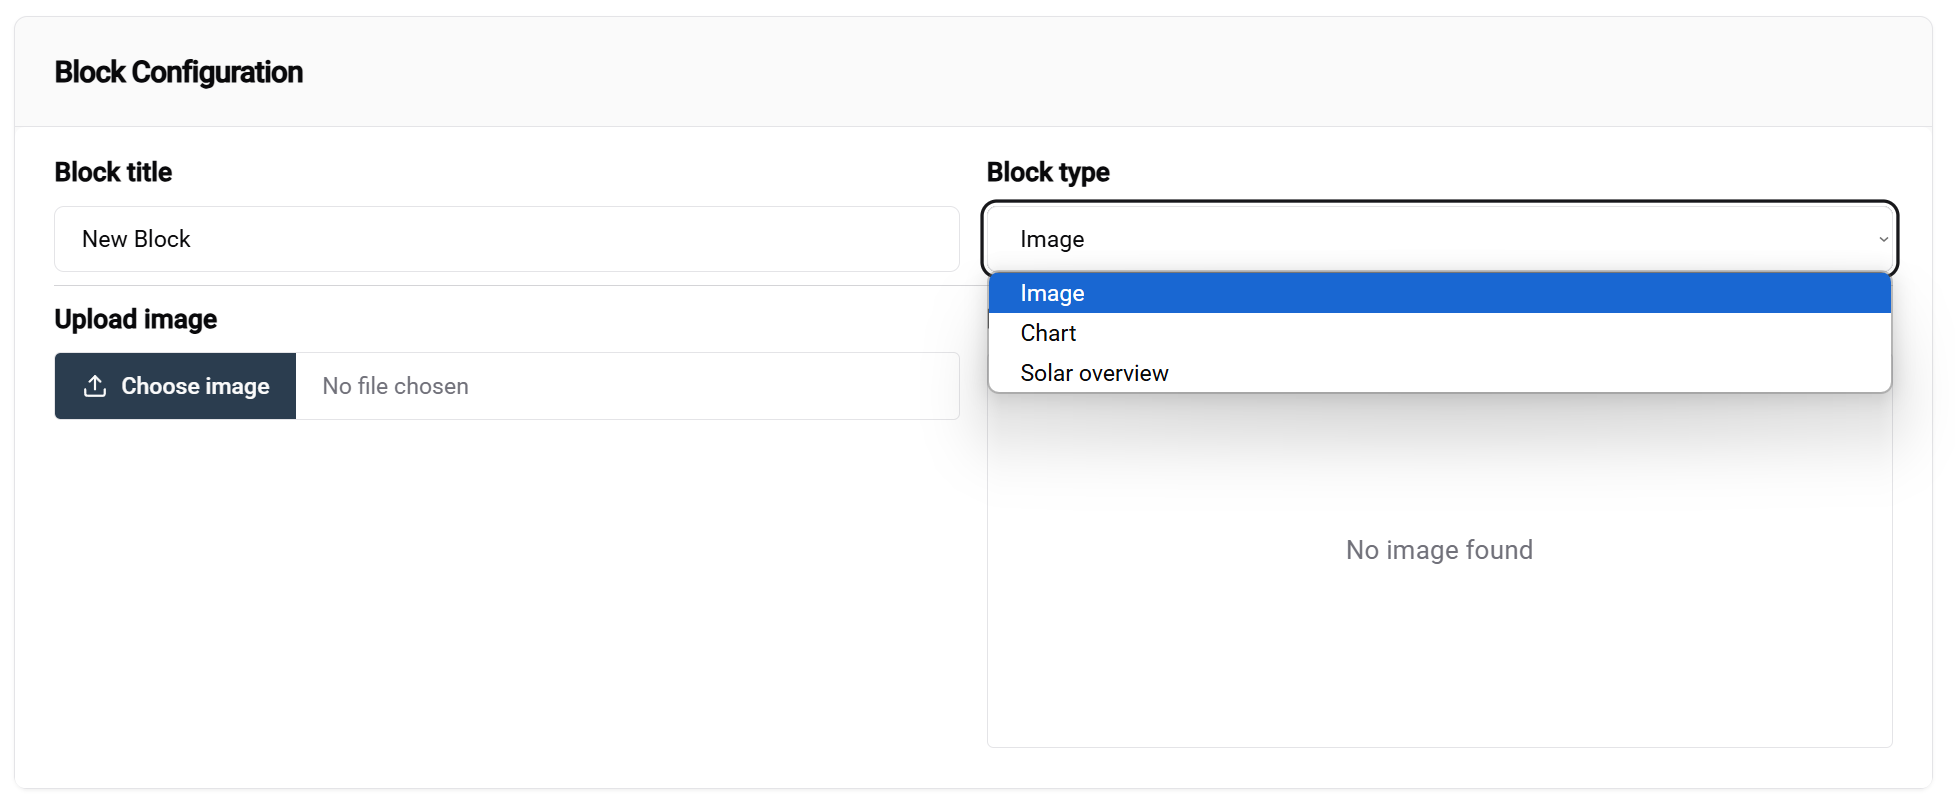
Flujo de trabajo de configuración:
- Selecciona un bloque para ver sus opciones
- Elige el tipo de bloque del menú desplegable (configuración más importante)
- Configura ajustes específicos del bloque en el panel inferior
📚 Aprender Más: Información detallada sobre diferentes tipos de bloques está disponible en la documentación de la Plantilla de Display Público.
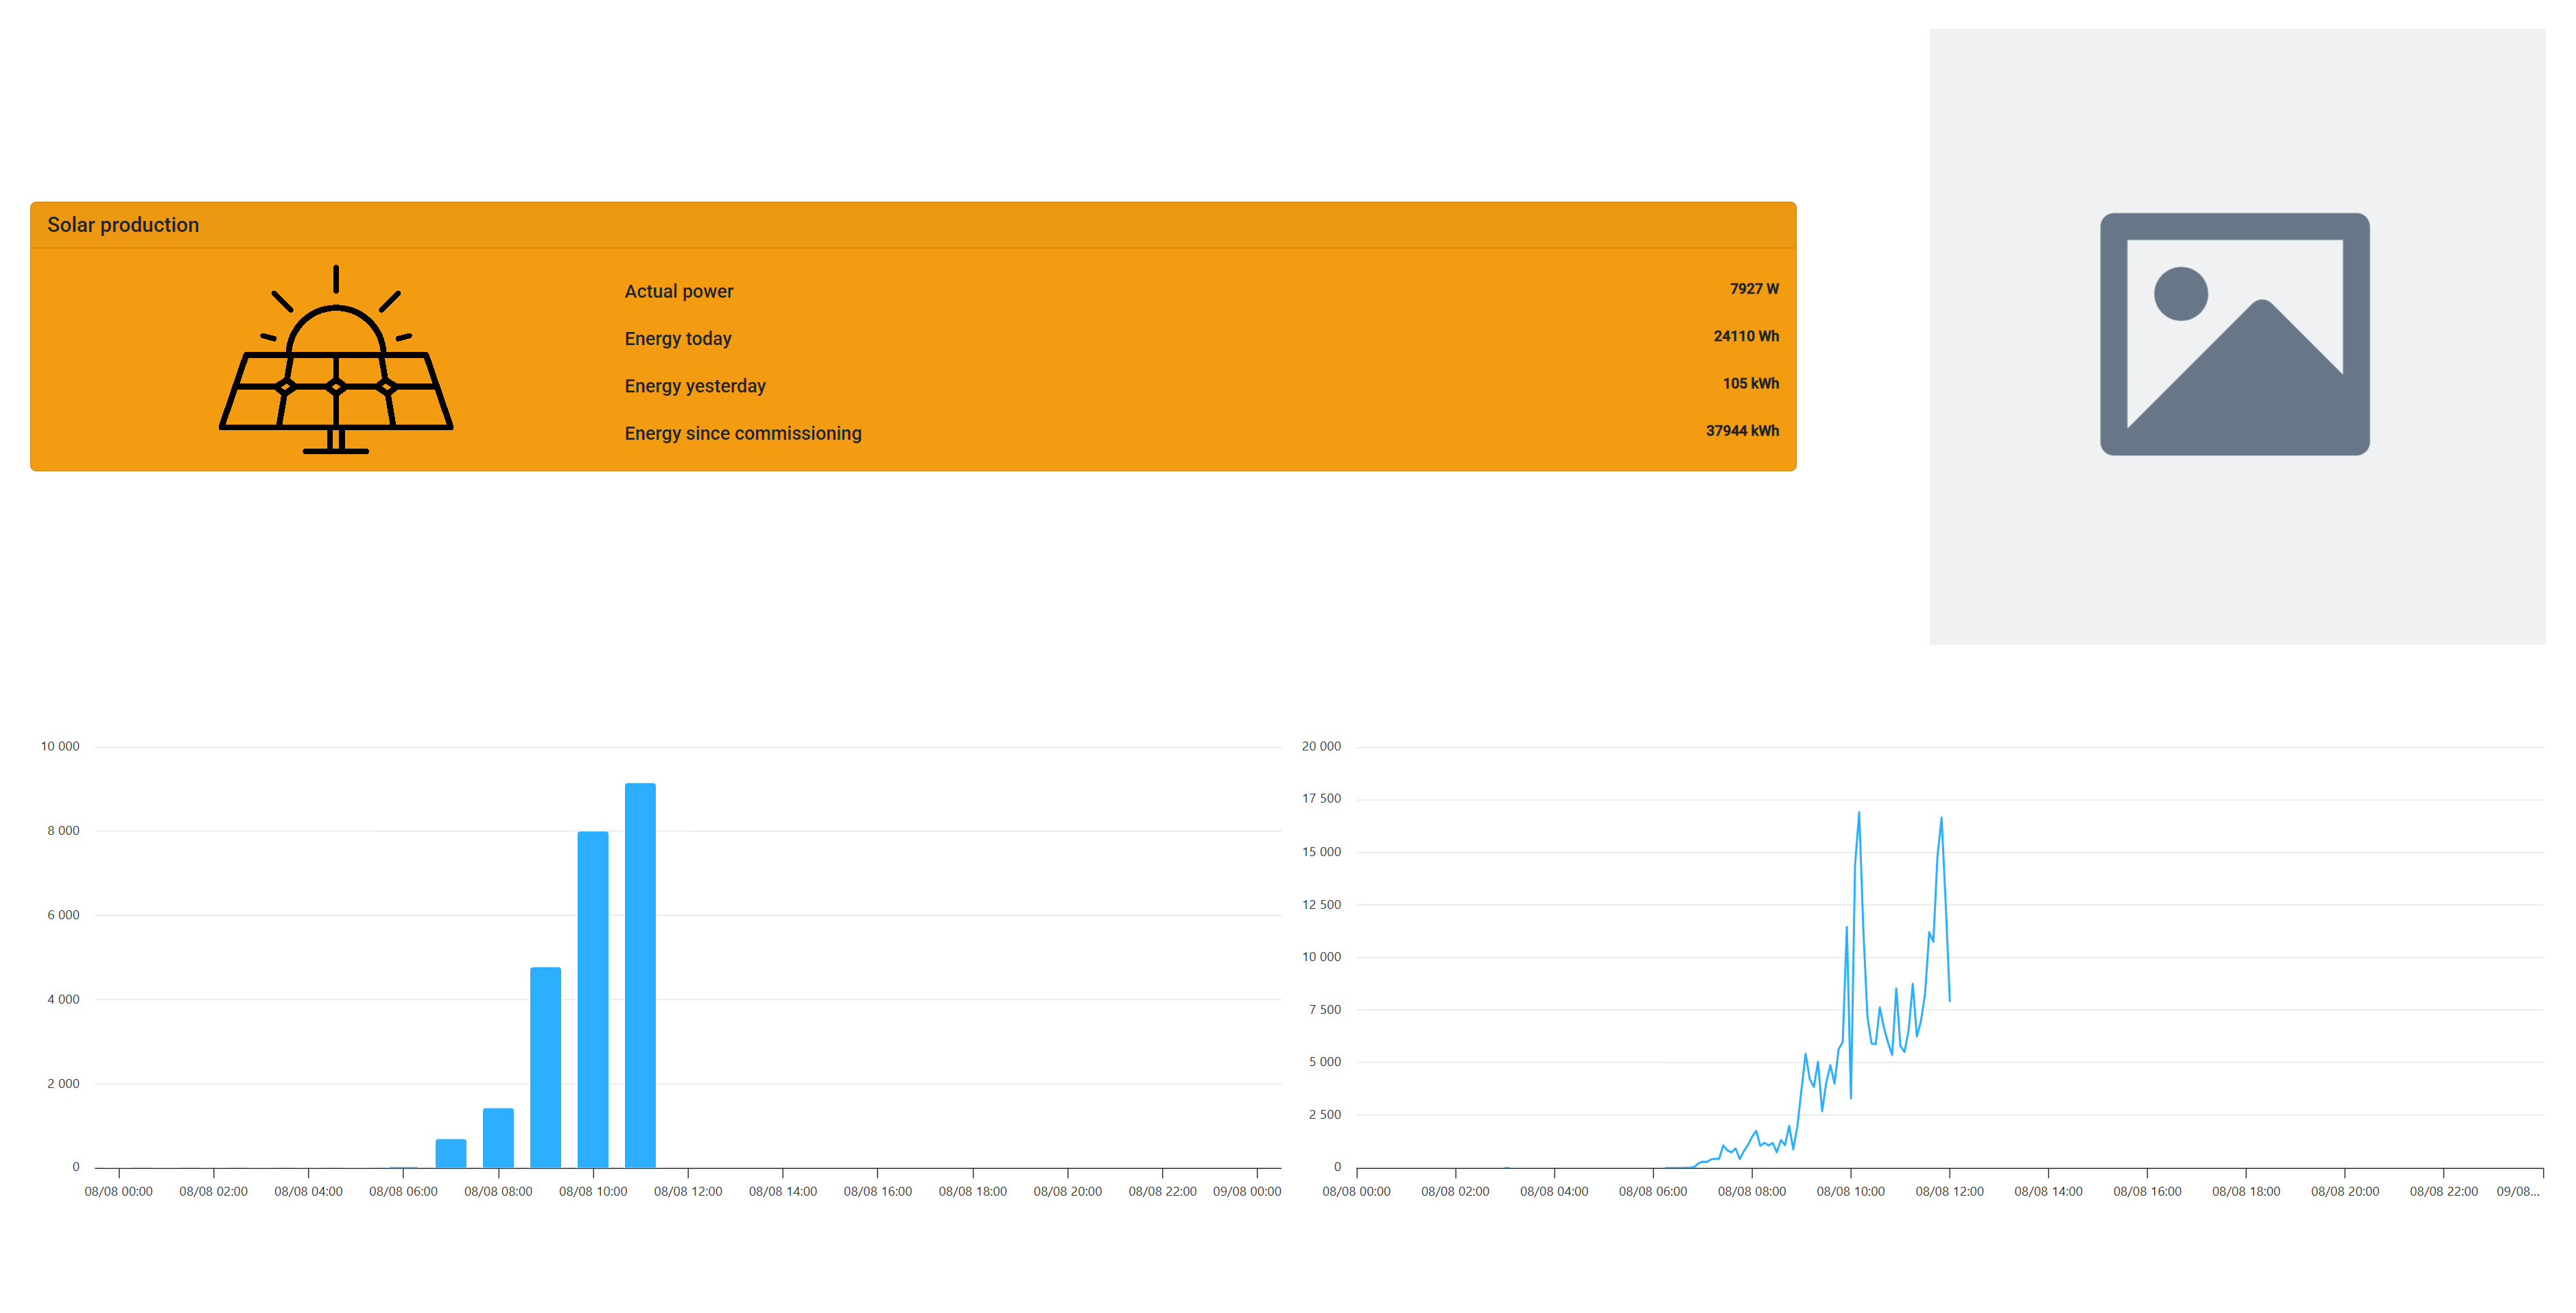
Ejemplo de Configuración de Plantilla
Este ejemplo demuestra una configuración completa de plantilla con bloques etiquetados que muestran sus respectivas configuraciones y propósitos.
💾 Guardando tu plantilla:
- Haz clic en el botón de guardar (esquina superior derecha) cuando estés satisfecho con tu diseño
- Tu plantilla estará disponible para su uso en configuraciones
Resumen de Plantillas

✅ ¡Plantilla creada con éxito! Tu nueva plantilla ahora aparece en la tabla de gestión, lista para:
- ✏️ Edición adicional
- 🗑️ Eliminación si es necesario
- ⚙️ Configuración en el siguiente paso
3. Configuración del Display Público
📖 Para opciones de configuración detalladas, visita la página de documentación de Configuración de Displays Públicos.
En este último paso, aplicarás tu plantilla a una instalación específica y, opcionalmente, la vincularás a tu controlador reclamado.
🎯 Resultados después de completar:
- Con controlador: Ver tu pantalla pública en el dispositivo de pantalla físico
- Sin controlador: Previsualizar cómo se verá tu pantalla pública cuando se despliegue
🧪 Ventaja de Pruebas: Puedes preparar y probar plantillas y configuraciones antes de vincularlas a controladores, asegurando que todo funcione perfectamente antes del despliegue.
Accediendo a la Configuración
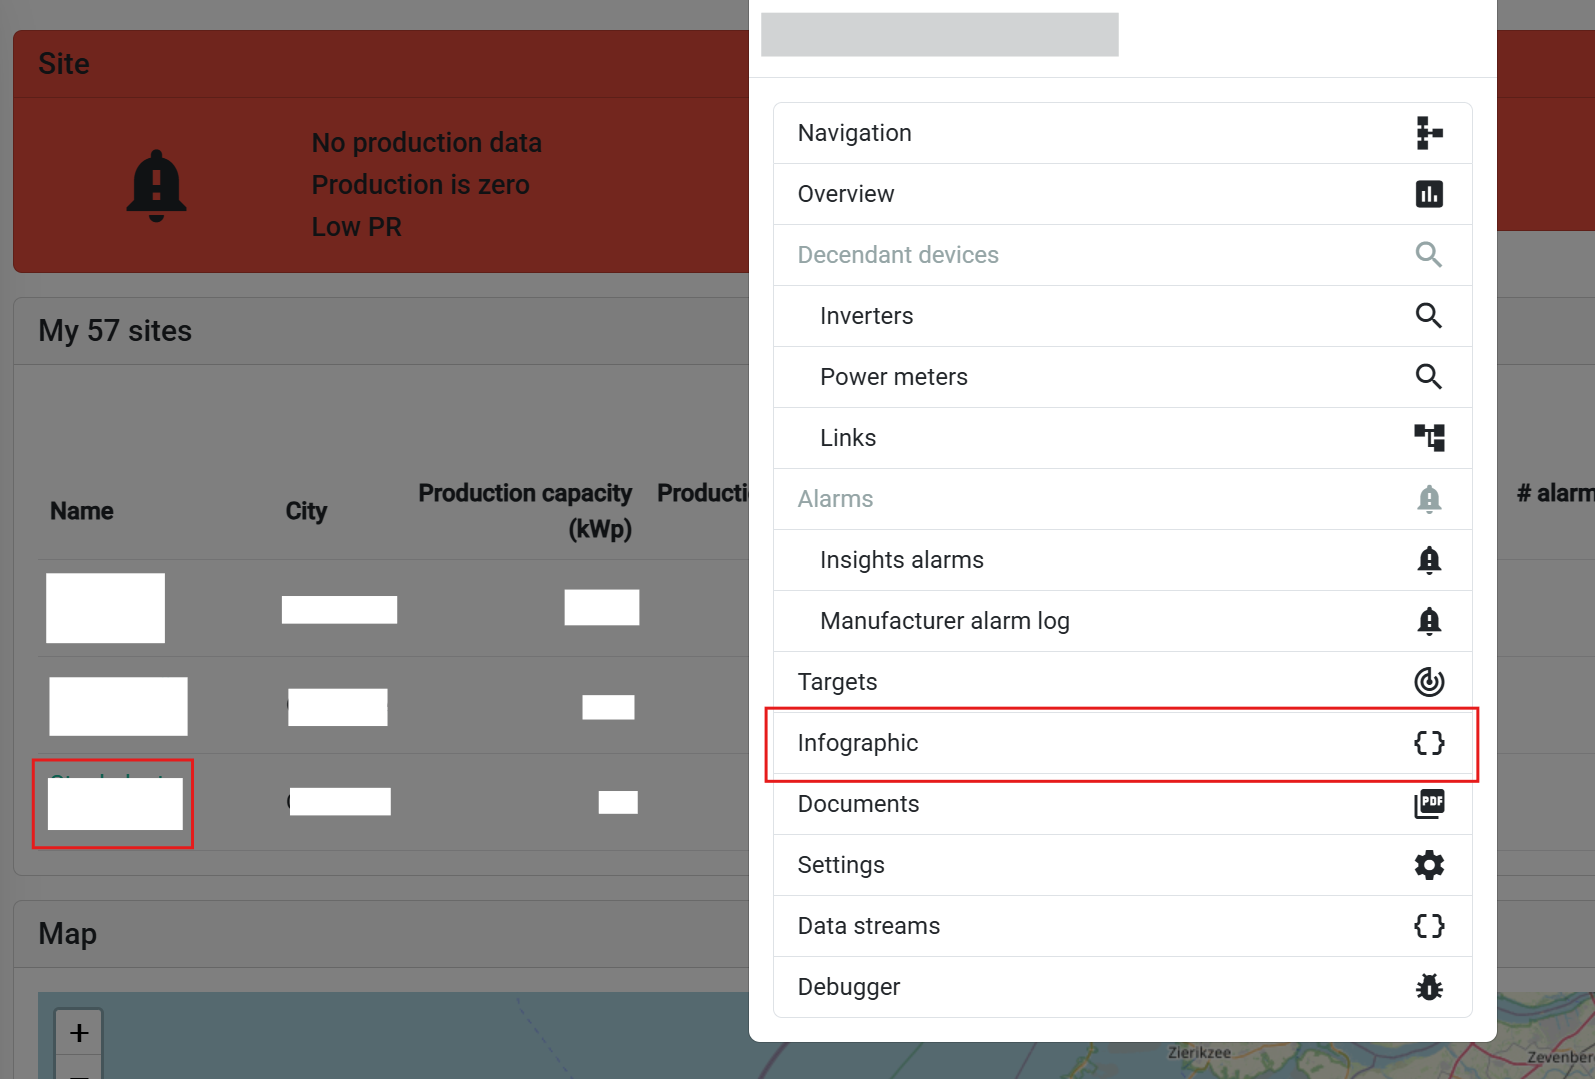
Pasos de navegación:
- Ve a tu página de resumen de instalación
- Selecciona una instalación o controlador de la lista
- Elige 'Pantalla pública' del menú emergente
Gestión de Configuración

La tabla de configuración muestra:
- ��📋 Todas las configuraciones existentes para la instalación seleccionada
- Botón de ➕ Agregar nueva configuración (esquina superior izquierda)
Creando una Nueva Configuración

Configuración de plantilla:
- Selecciona plantilla del menú desplegable
- Elige tu plantilla creada previamente
- Revisa los bloques disponibles y sus propiedades editables
Configuración Específica de Bloques
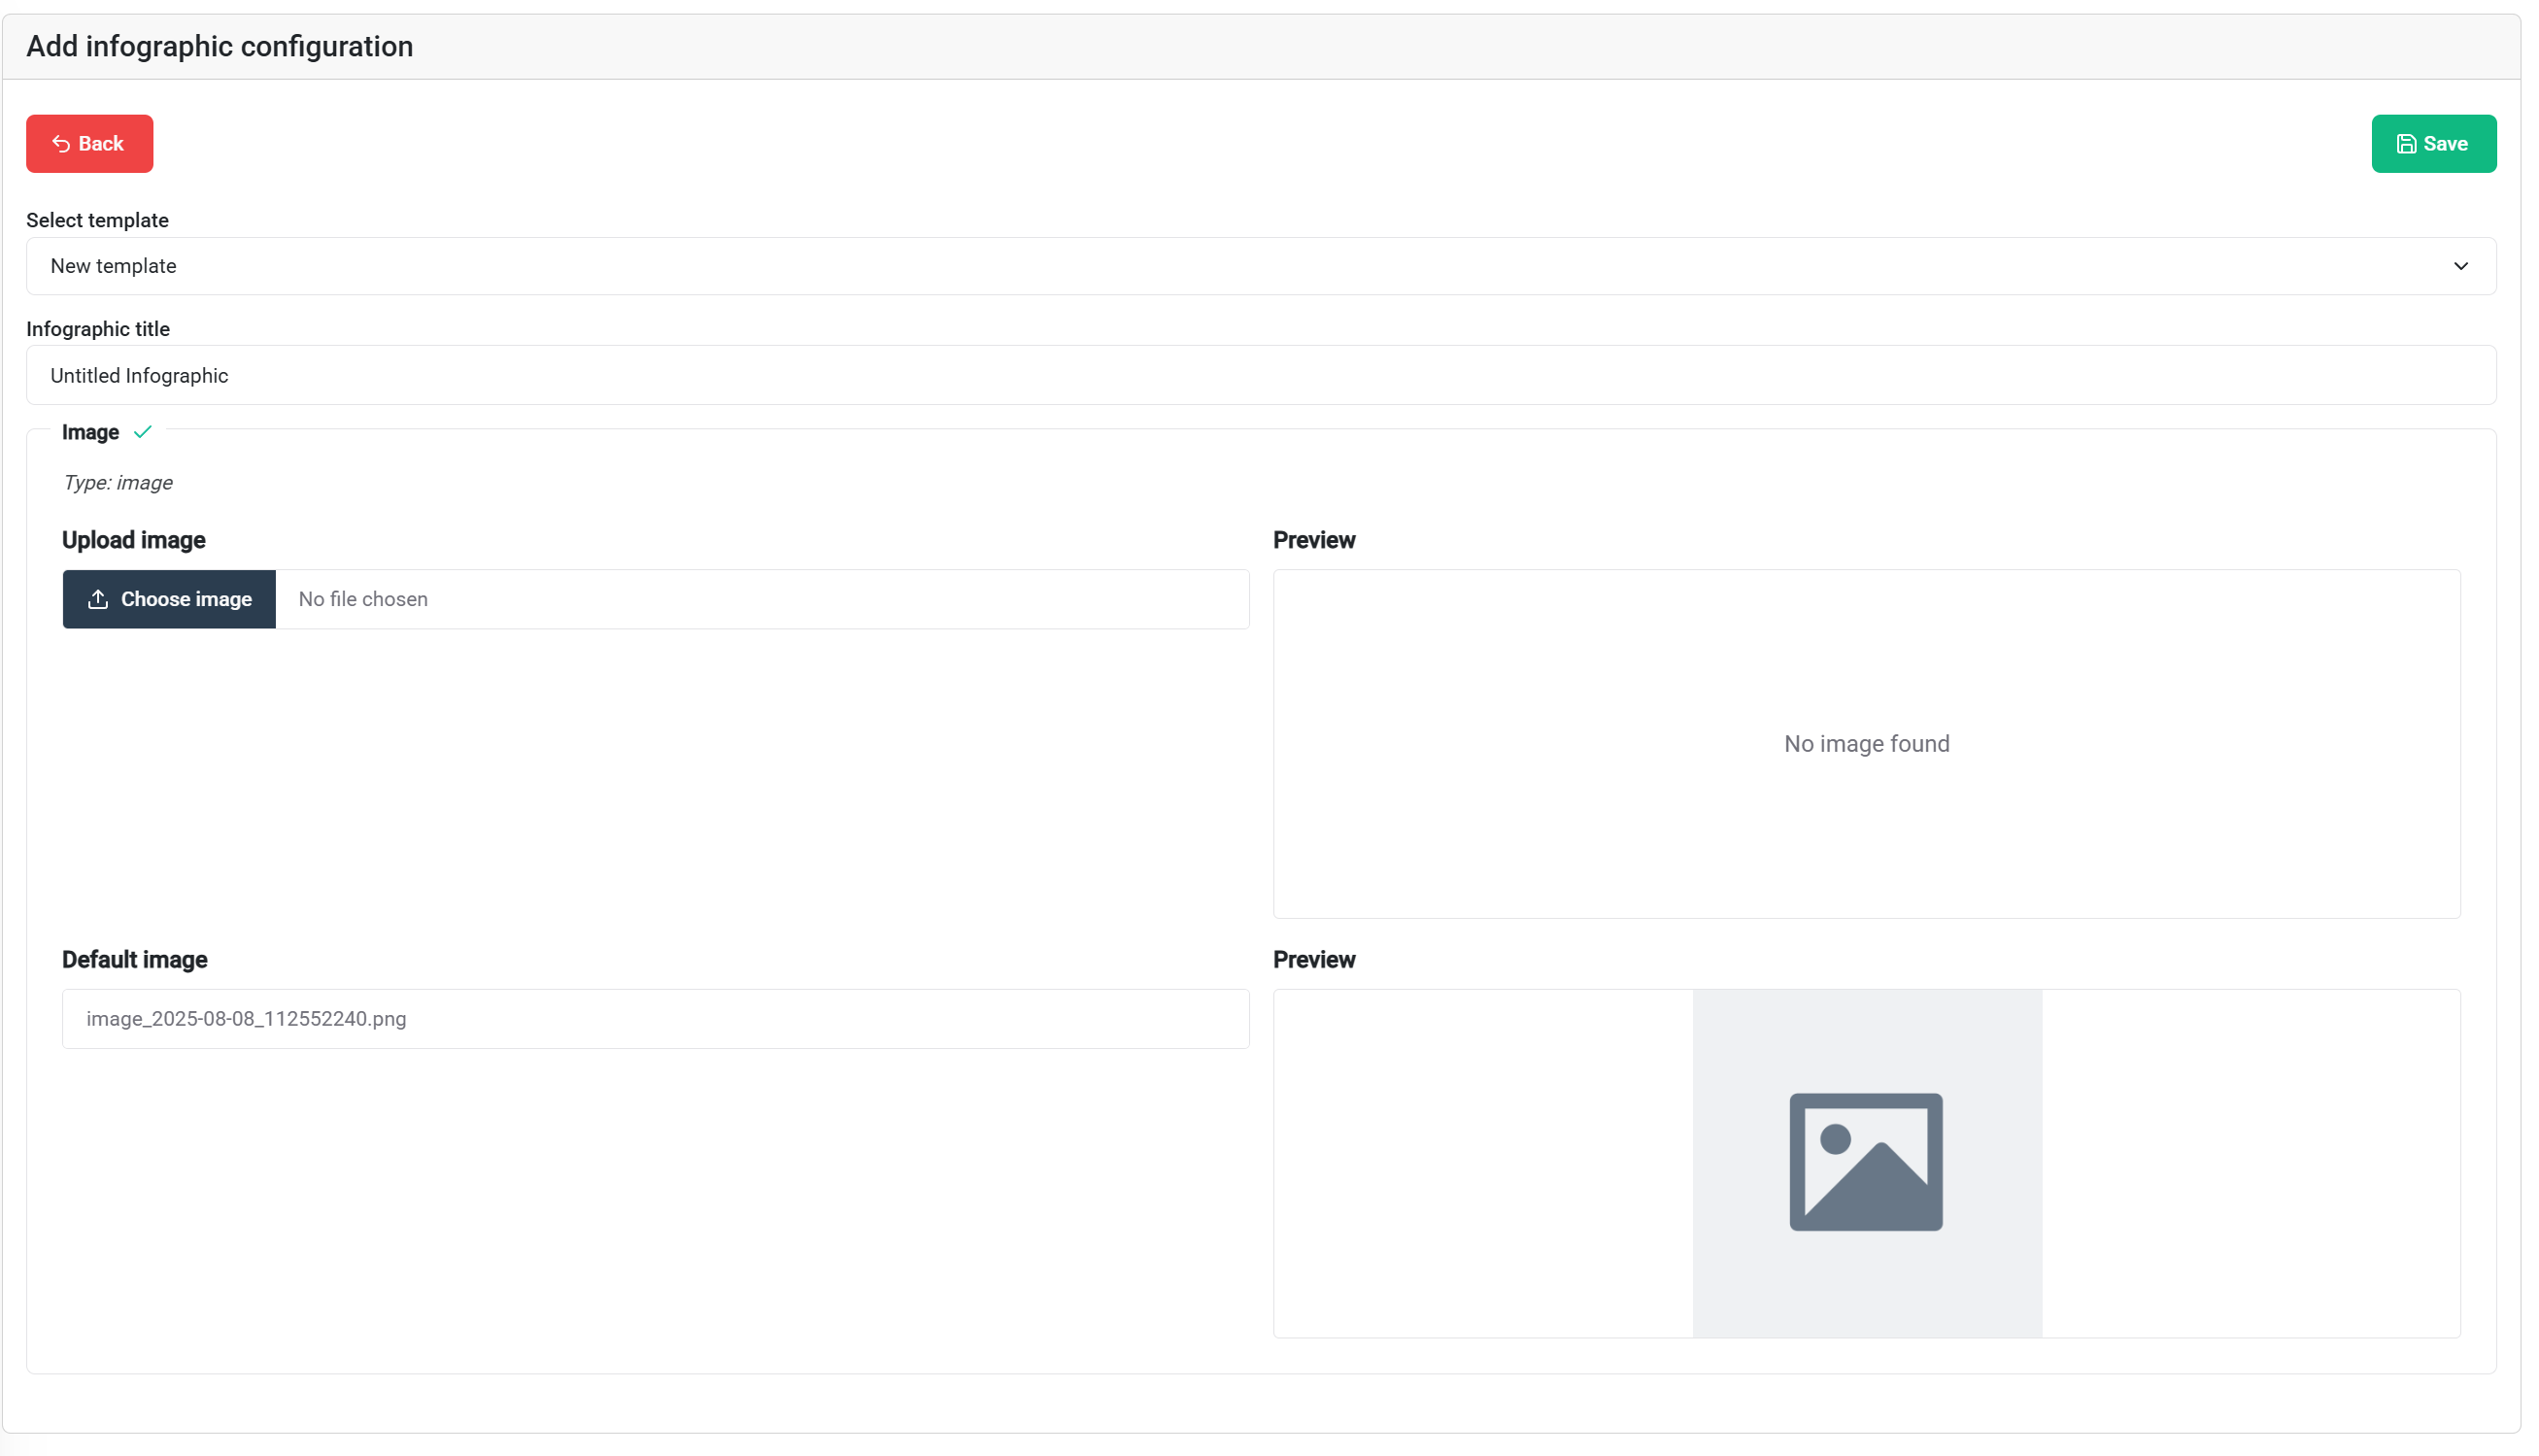
Opciones de configuración:
- No todos los bloques son actualmente configurables. Esto cambiará a medida que continúe el desarrollo.
- El contenido prellenado de las plantillas se puede usar tal cual o personalizar
- Sobrescribir configuraciones predeterminadas con contenido específico de la instalación
💡 Consejo: Las imágenes estándar de las plantillas proporcionan una base - personaliza solo lo que necesita ser específico de la instalación.
💾 Guarda tu configuración utilizando el botón de guardar en la esquina superior derecha cuando estés listo.
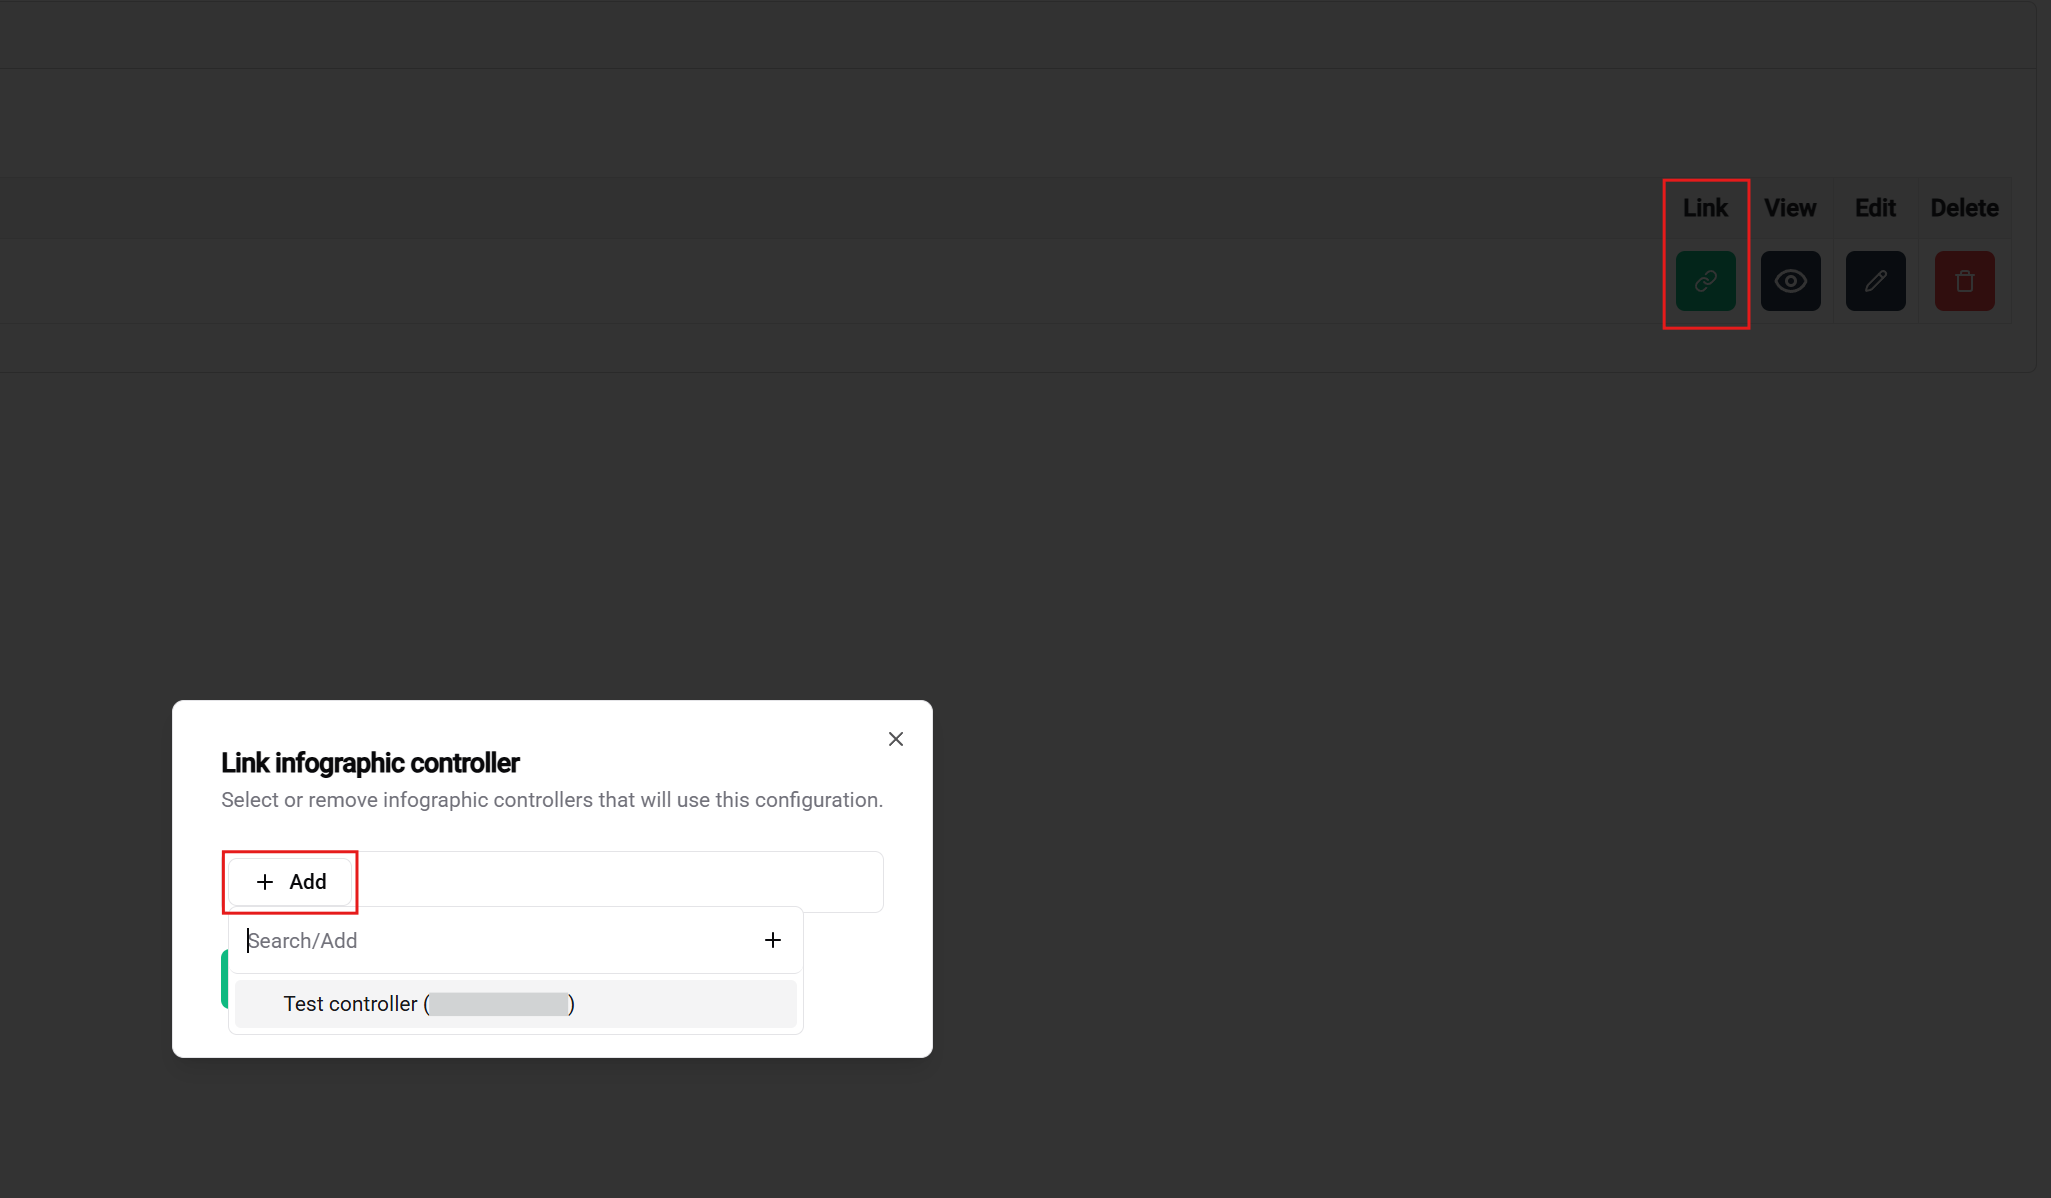
Acciones de Configuración

Acciones disponibles para configuraciones guardadas:
- 🎛️ Reclamar Controlador - Vincular al dispositivo de hardware
- 👁️ Ver - Previsualizar el resultado final
- ✏️ Editar - Modificar configuraciones
- 🗑️ Eliminar - Remover configuración
Previsualiza Tu Pantalla Pública
Características de previsualización:
- Visualización en tiempo real de cómo aparecerá la pantalla pública en el controlador
- Pruebas responsivas - Redimensiona la ventana de tu navegador para ver cómo se adapta el diseño a diferentes tamaños de pantalla
- Validación final antes del despliegue del controlador
Vinculando al Controlador
Paso final de despliegue:
- Regresa a la tabla de configuración
- Haz clic en 'Reclamar Controlador' para vincular tu configuración
- Completa la configuración conectando el controlador físico
🎉 ¡Éxito! Una vez que todo esté configurado, vinculado y el controlador esté conectado, tu pantalla pública personalizada se mostrará en la pantalla.